Navigating The Unknown!
Table of Contents:
- 1. Deadline
- 2. Problem Statement
- 3. Environment
- 4. Navigation Stack
- 5. Testing For Various Window Shapes
- 6. Testing (Live Demo)
- 7. Submission Guidelines
- 8. Allowed and Disallowed functions
- 9. Collaboration Policy
1. Deadline
11:59:59 PM, Nov 21, 2023.
2. Problem Statement
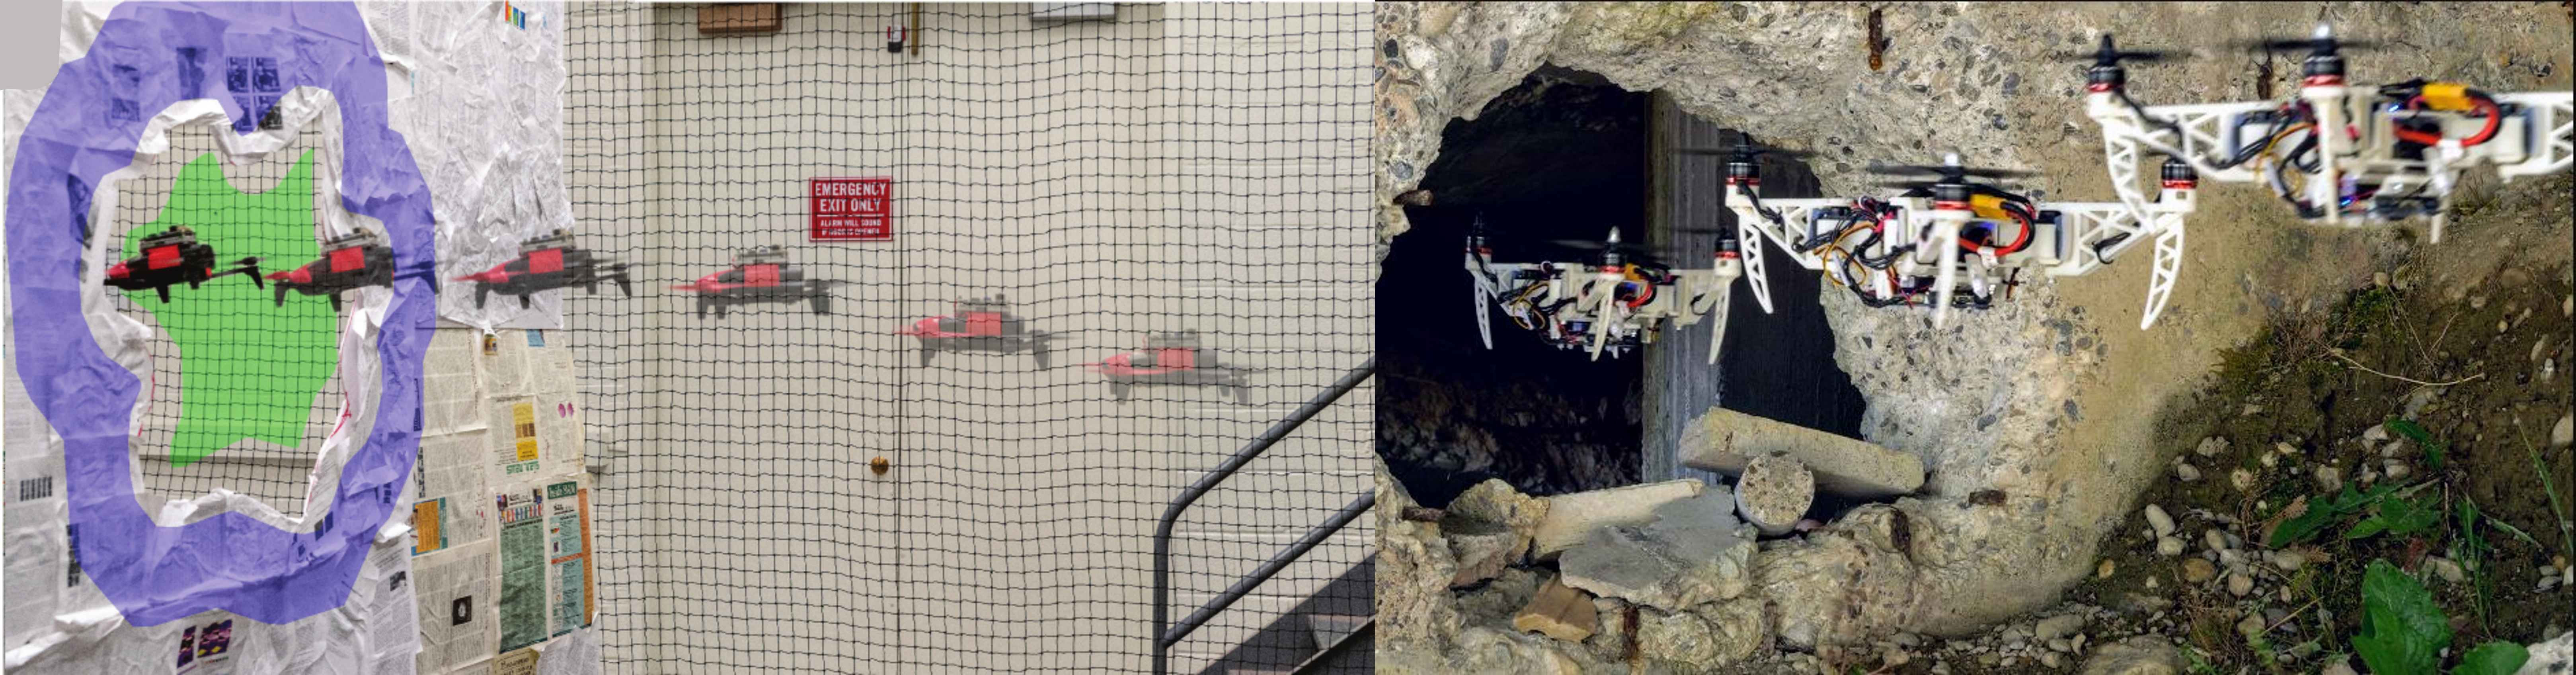
Flight through known windows is very cool and exciting but often in the real-world you have to fly through irregular and unknown shaped windows for search and rescue, exploration or reconnaissance purposes (See Fig. 1). To this end, experts in the field have developed a multitude of algorithms and approaches for building or sensing a 3D model of the world. Although this works very well, it is computationally and weight-wise prohibitive for our tiny little drones. In such a resource-constrained scenario, what can we do? Well you can think creatively, in one of the works from Prof. Sanket named GapFlyt (See Fig. 1 left), the team utilized the movement of the quadrotor to obtain additional cues for detection of the gap. The sky is the limit here (pun intended) for all the approaches you can come up with to detect a gap of unknown shape, size and location (assuming it is in the field of view) to detect it and fly through it. The project is completely open-ended and you are free to use any third party code to detect and fly though a gap of unknown shape, size and location. The only constraint is that your code has to run on the NVIDIA Jetson Orin Nano without any cloud computation during experiments.
3. Environment
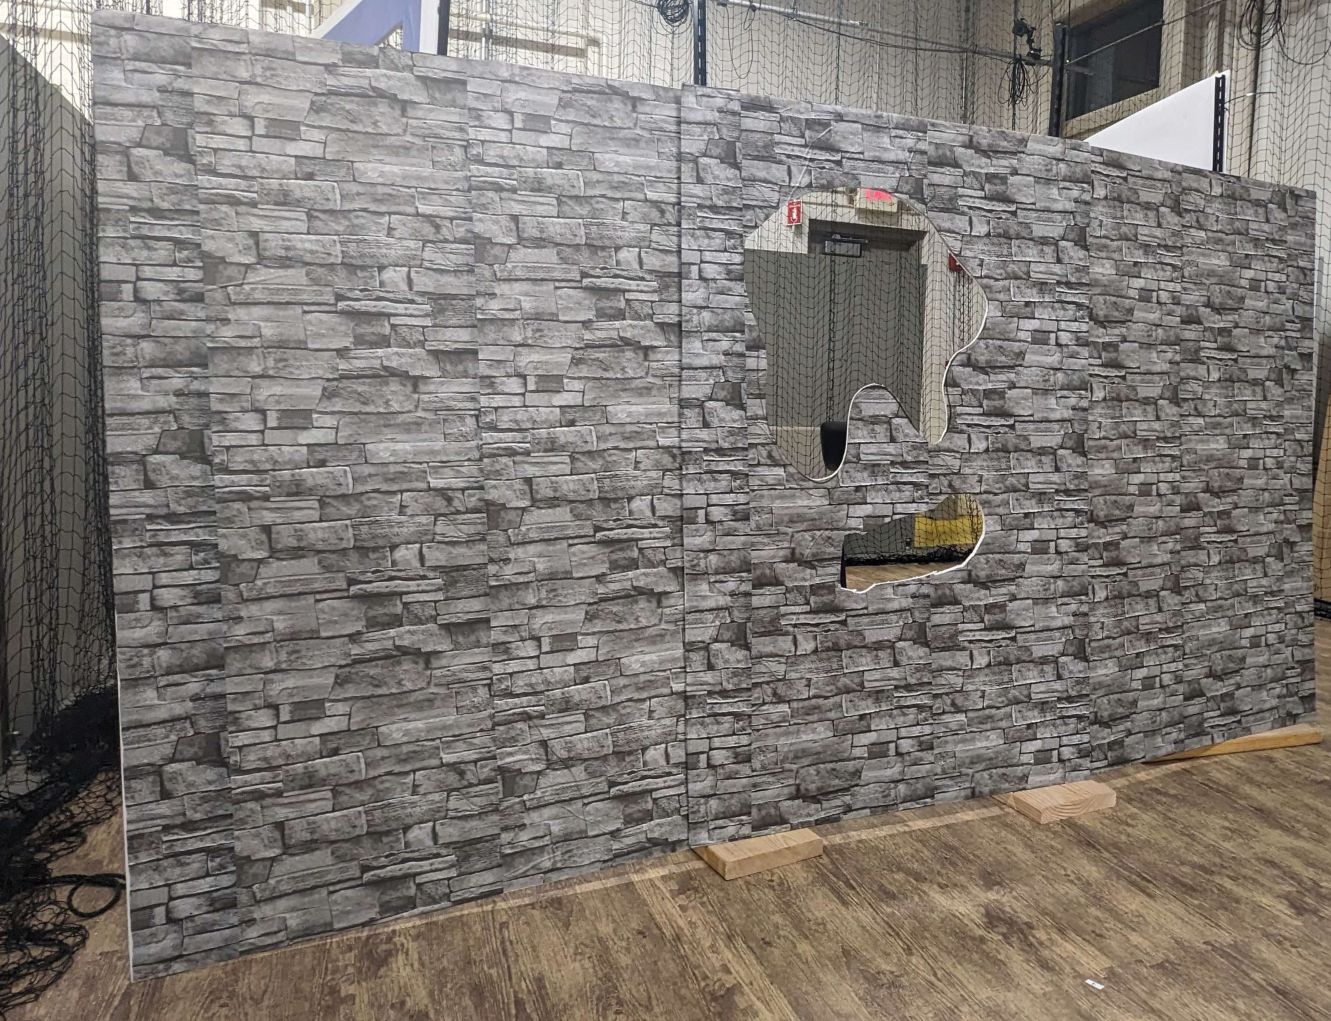
The environment has an arbitrary shaped window(s) which can be ‘seen’ from the origin location. The window is made of foamcore with texture stuck on it. You do not know the texture prior but we will ensure that the windows are not textureless or they dont fully blend into the background texture. Also, the colors on the window and the background can be similar but patterns will not be exactly the same. The board can be assumed to be nearly planar and can have multiple holes/gaps, in which case you’ll choose the largest one to fly through. The largest gap (if multiple gaps are present) will be large enough for the quadrotor to fly through it safely. The quadrotor will be placed at the origin (you are free to face the window or X-axis being 0) and the window will be between 1.8 to 3.5 m in front (positive Y axis) at yaw angle between -20 to +20 degrees. Furthermore, there is no guarantee that the window center will be at the center of the foamcore and that it will be aligned with X axis as zero, it can be offset by 0.5m on either side of the X axis. Once you take off, you should be able to see a part of the window atleast, you might need additional exploratory maneuvers to see the entire window. An example of an arbitrary shaped window is shown in Fig. 2. In other words, the smaller gaps might not be large enough for the quadrotor to fly through. Also, flying from the side of the foamcore does not count as a successful navigation. You can also assume that the window shape is nearly convex.
4. Navigation Stack
4.1. Perception Stack
You are free to use any method to detect and track the window to fly through it. Methods can include estimating depth (if they generalize), estimating optical flow, estimating occlusions, estimating flow uncertainty to name a few. You are allowed to use any third party code for this as long as they run on the DJI Orin Nano without any cloud computing.
4.2. Planning and Control Stack
You are free to use any method to generate waypoints to fly through the window (you’ll use the DJITelloPy package for follow). The planner could be something simple like a hierarchical task planner (such as a state machine) or a 3D planner such as RRT*. The controller again can be 3D waypoint following or simple alignment on the image plane. The design choice is all yours. The goal is to fly through the gap that you can fit through safely without any collisions.
Note that we have ZERO tolerance to collisions and your attempt ends the moment the quadrotor makes contact with anything else.
5. Testing For Various Window Shapes
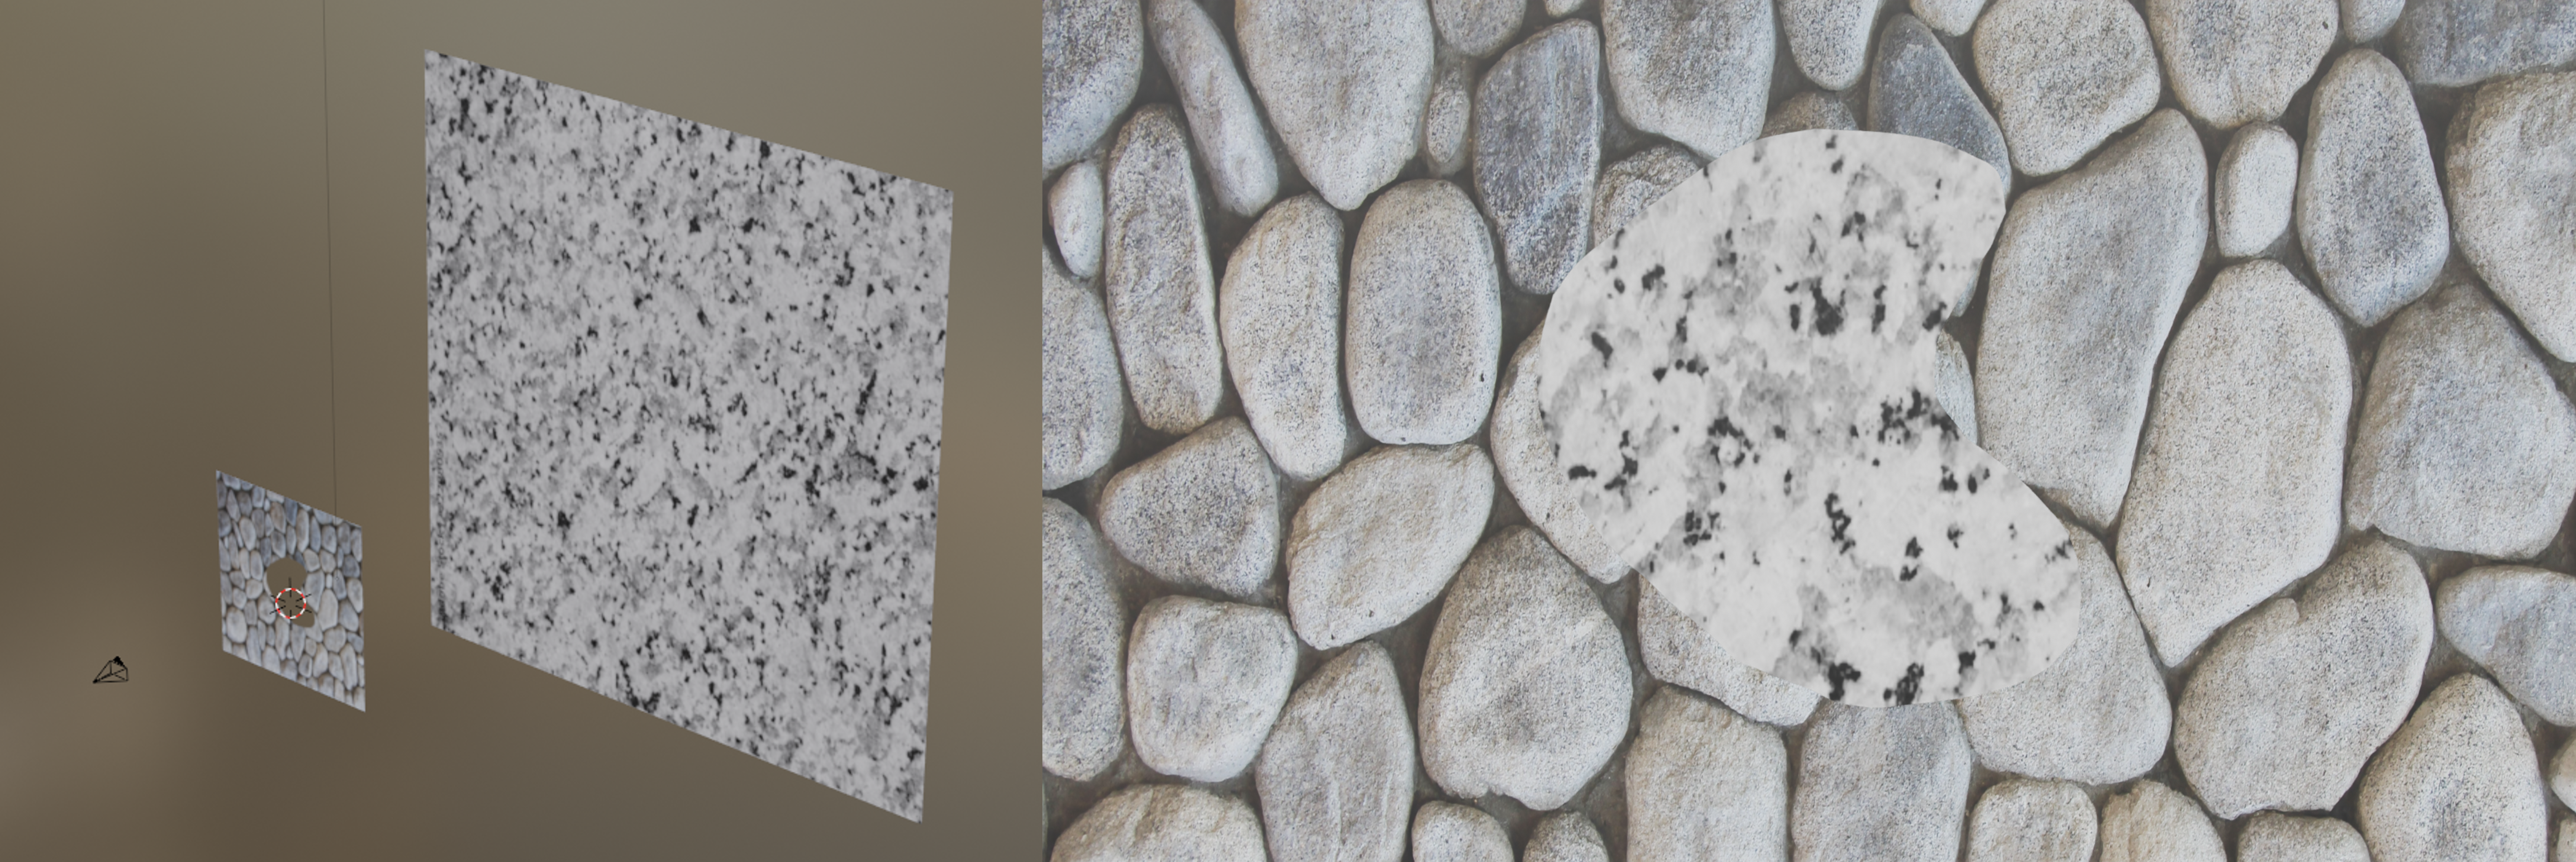
Testing on real-data with various arbitrary window shapes can be hard. Hence, to enable fast prototyping, we want you to test on four arbitrary window shapes and present the results in your report along with the live demo (more details in the next section). You can download the package from here. You can move the camera as you wish in this case as required by your algorithm either through code or using animations and change the window textures to any image for your testing (we have included four example textures for you to experiment with in Assets\Textures folder). The window shapes are produced by an Alpha mask where white color represents foreground and black color represents background (feel free to create any shapes you want for testing). The masks for windows are given in in Assets\Windows folder. You need to run the Window.blend file to experiment in simulation. You need to compare your detection results with the ground truth mask obtained using Pass Index (set to 2 in the blend file) and saved in Outputs\GTMasks folder using the Intersection over Union (IoU) metric. Furthermore, if you want to change the window textures or cutout shape, you have to go to the Shading editor tab on the top and change the respective textures: Mask node for the window cutout mask, ImageFg node for the foreground texture (on the window plane) and ImageBg node. An example environment and one of its rendered image are shown in Fig. 3.
6. Testing (Live Demo) And Grading
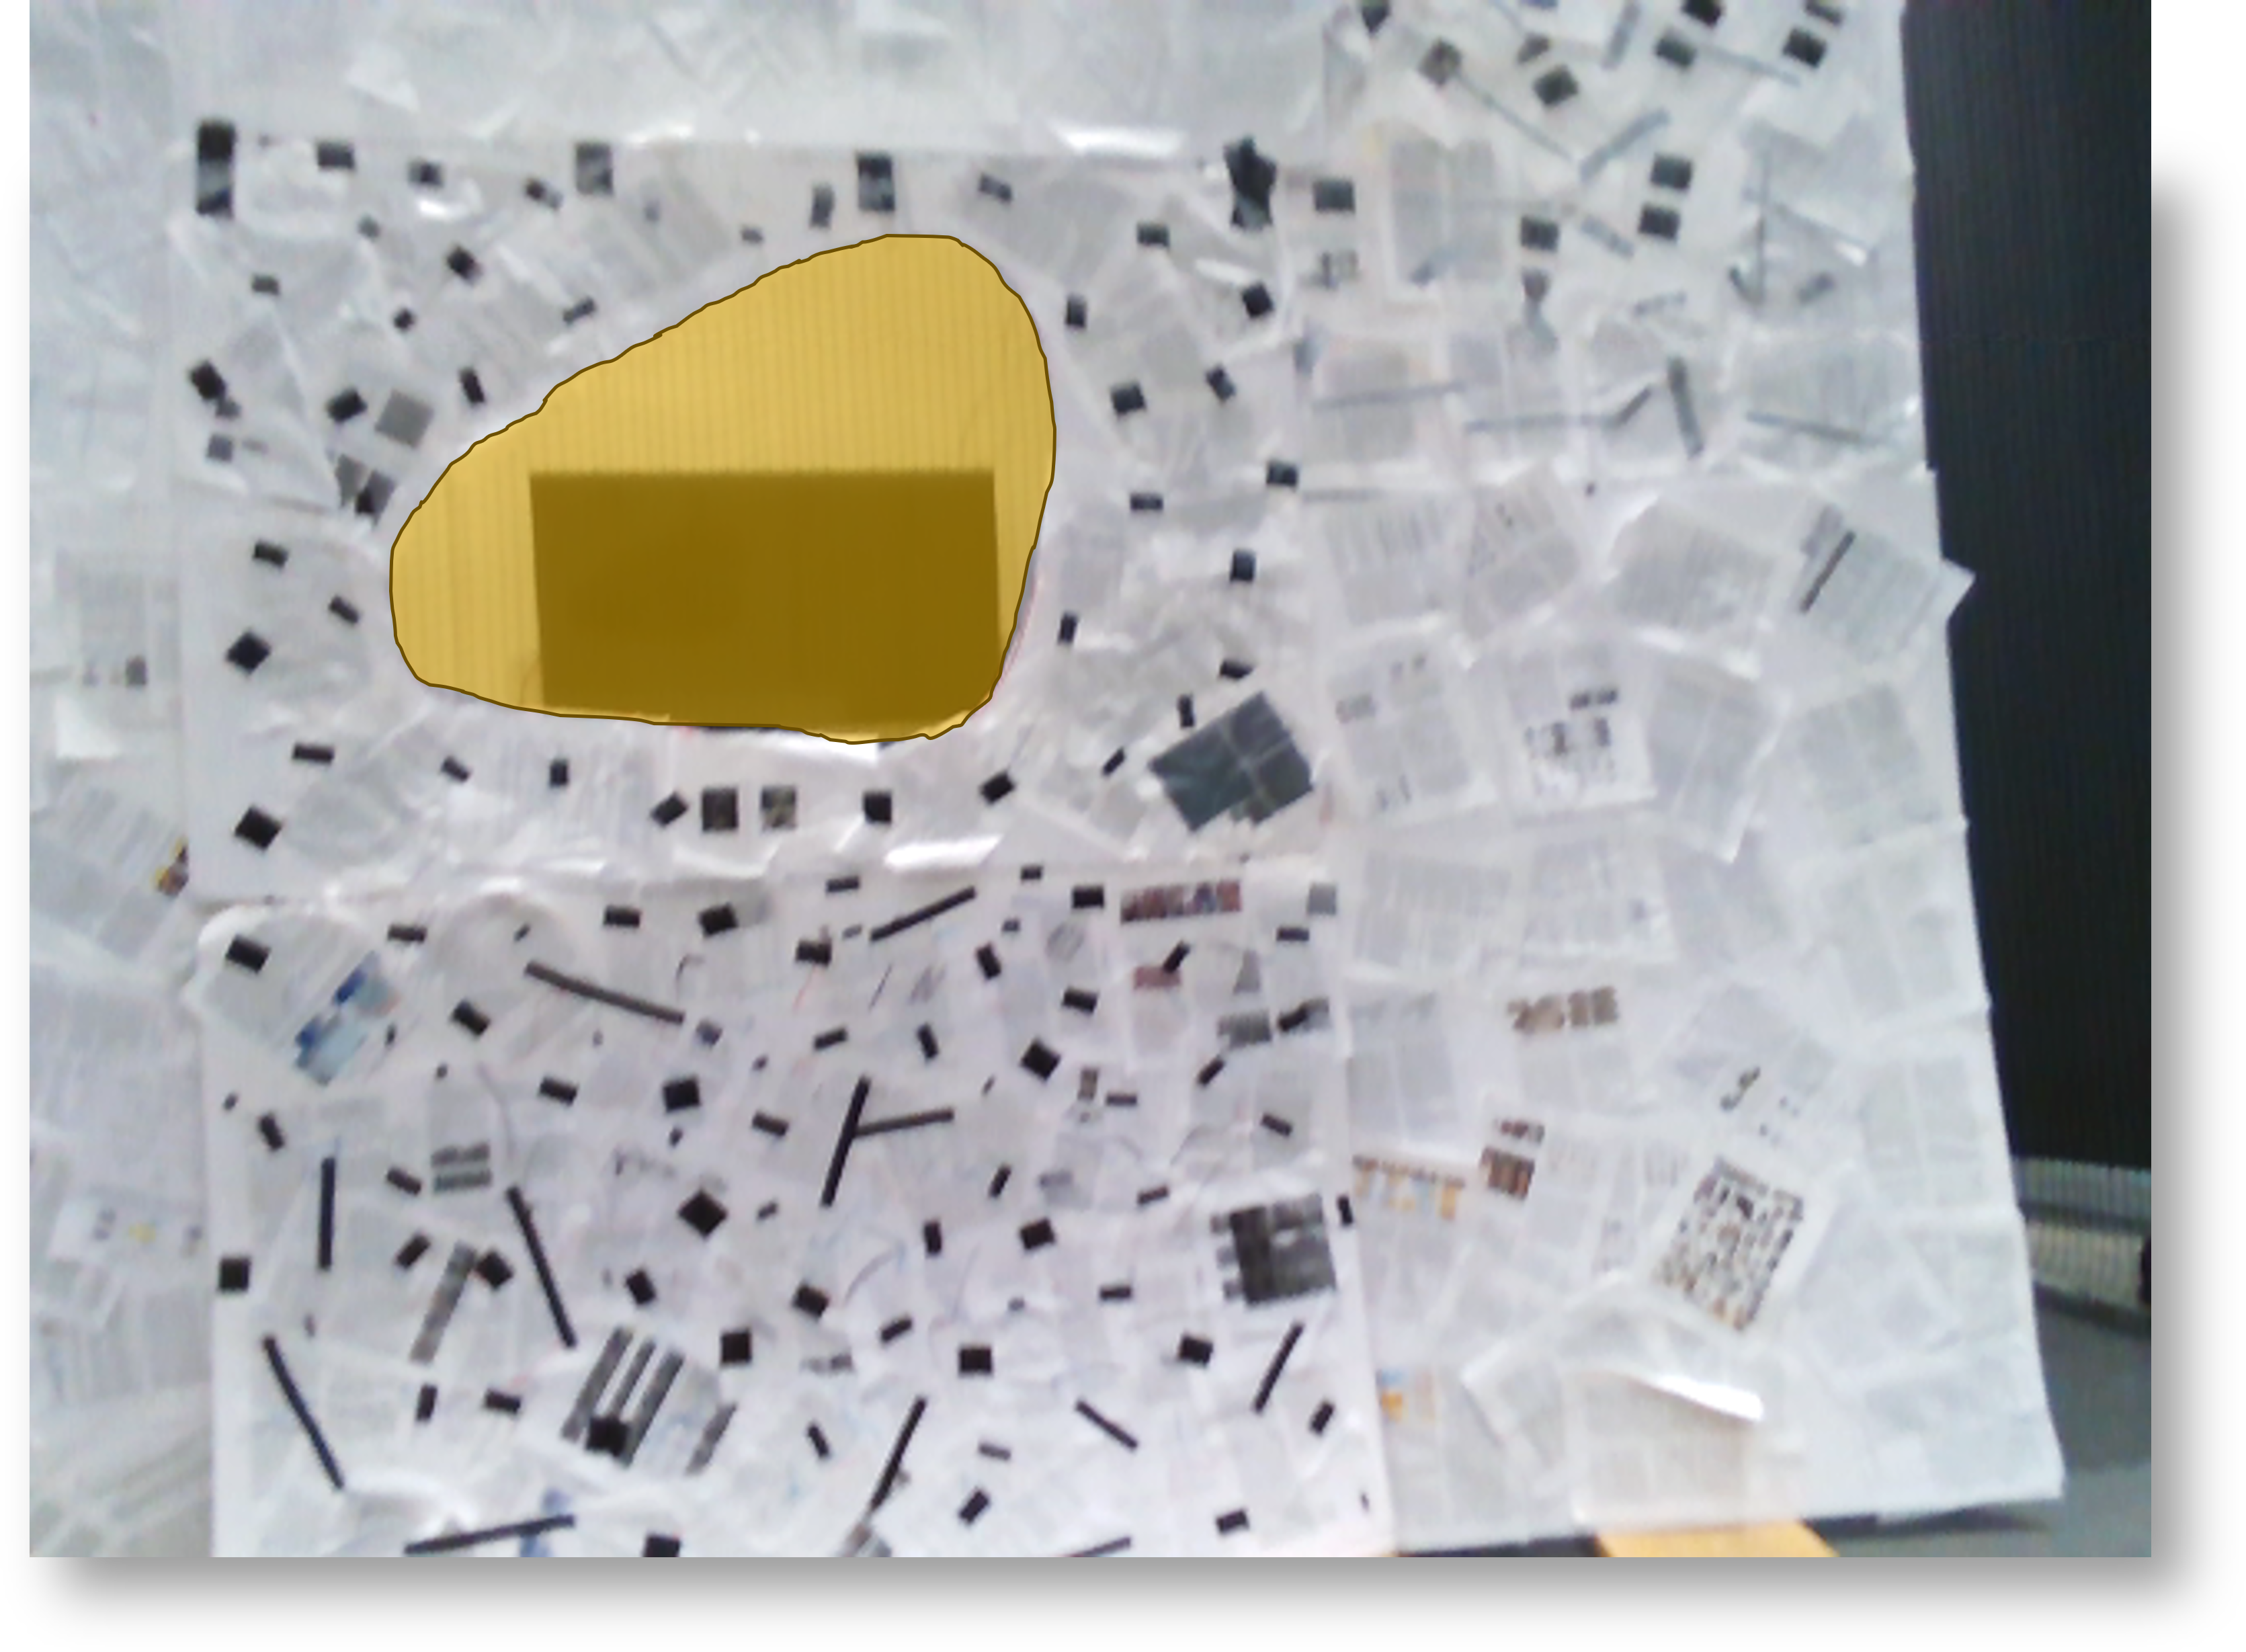
On the day of the deadline, each team will be given a 15 minute slot for demoing their code in action to the instructors. The instructors will place the window as they wish (within the extents provided in the Environment description). The quadrotor will be placed at the origin (you are free to face the window or X-axis being 0). The task is the fly through the an unknown gap as fast as possible without any collisions. You can get as many attempts as you want to accomplish this within your 15 minute time slot. Your final grade for the demo is decided based on completion (successful flight through a window) and time. You are required to show us a detection of the gap as an overlay as shown in Fig. 4 when you fly through it. Optionally you can also show us a visualization of the tracking of the gap.
7. Submission Guidelines
If your submission does not comply with the following guidelines, you’ll be given ZERO credit.
7.1. File tree and naming
Your submission on ELMS/Canvas must be a zip file, following the naming convention YourDirectoryID_p4.zip. If you email ID is abc@wpi.edu, then your DirectoryID is abc.For our example, the submission file should be named abc_p4.zip. The file must have the following directory structure. The file to run for your project should be called YourDirectoryID_p4/Code/Wrapper.py. You can have any helper functions in sub-folders as you wish, be sure to index them using relative paths and if you have command line arguments for your Wrapper codes, make sure to have default values too. Please provide detailed instructions on how to run your code in README.md file.
NOTE: Please DO NOT include data in your submission. Furthermore, the size of your submission file should NOT exceed more than 500MB.
The file tree of your submission SHOULD resemble this:
YourDirectoryID_p4.zip
├── Code
|   ├── Wrapper.py
|   └── Any subfolders you want along with files
├── Report.pdf
├── Video.mp4
└── README.md
7.2. Report
For each section of the project, explain briefly what you did, and describe any interesting problems you encountered and/or solutions you implemented. You must include the following details in your writeup:
- Your report MUST be typeset in LaTeX in the IEEE Tran format provided to you in the
Draftfolder and should of a conference quality paper. Feel free to use any online tool to edit such as Overleaf or install LaTeX on your local machine. - Results of testing on the four arbitrary window shapes provided in Blender.
7.3. Video
Record your successful run in .mp4 format during your demo or before and submit it in the zip file. Make sure to name it as Video.mp4. Record the video in the highest resolution and fastest fps possible on your recording device with minimum being 1080p at 30fps. Record the video horizontally and such that the nets do not cover the frame. Use a super steady hand or a tripod for good quality shots.
8. Allowed and Disallowed functions
Allowed:
- Any functions regarding reading, writing and displaying/plotting images in
cv2,matplotlib - Basic math utilities including convolution operations in
numpyandmath - Any functions for pretty plots
- Quaternion libraries
- Any library that perform transformation between various representations of attitude
- Any code for alignment of timestamps
- Any code for data handling, network setup and architecture engineering
- Any code for estimation of 3D poses from 2D images
- Any code for data augmentation and similar functionality
- Any third party code with the correct citation
Disallowed:
- Other student’s code in class
If you have any doubts regarding allowed and disallowed functions, please drop a public post on Piazza.
9. Collaboration Policy
NOTE: You are STRONGLY encouraged to discuss the ideas with your peers. Treat the class as a big group/family and enjoy the learning experience.
However, the code should be your own, and should be the result of you exercising your own understanding of it. If you reference anyone else’s code in writing your project, you must properly cite it in your code (in comments) and your writeup. For the full honor code refer to the RBE595-F02-ST Fall 2023 website.